
Cloud-based QES online
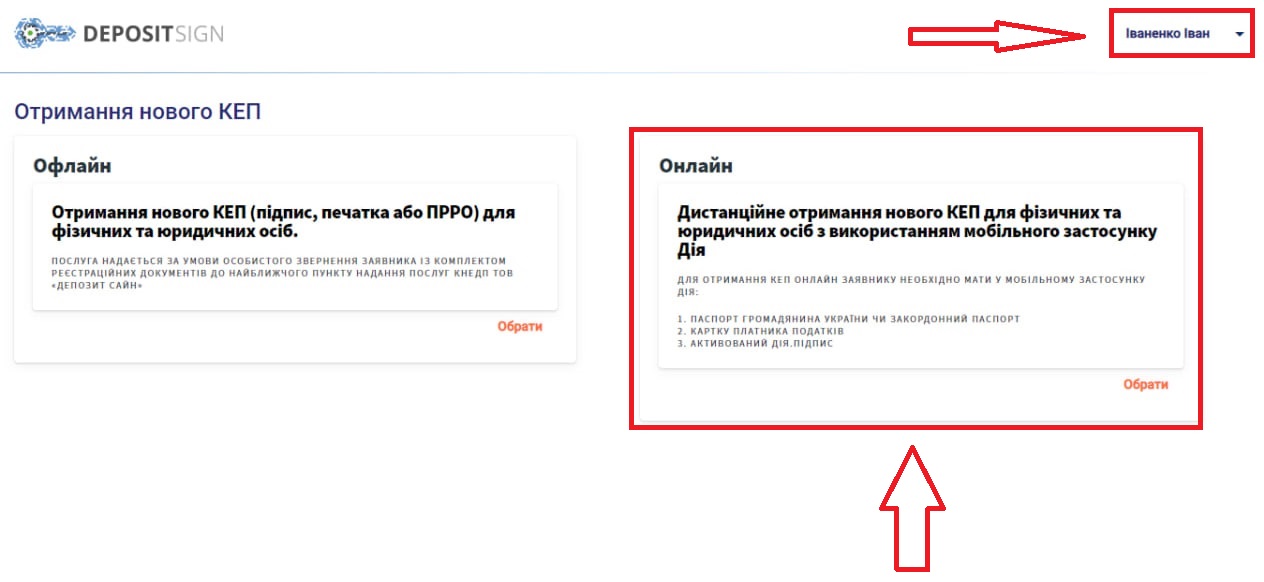
Log in to your DepositSign account and click “Get KEP”

In the “ONLINE” section, click “Select”
Attention! This method of obtaining a QES can be used by users of the Diya application who have a valid ID card or passport of a citizen of Ukraine.
Step 1:
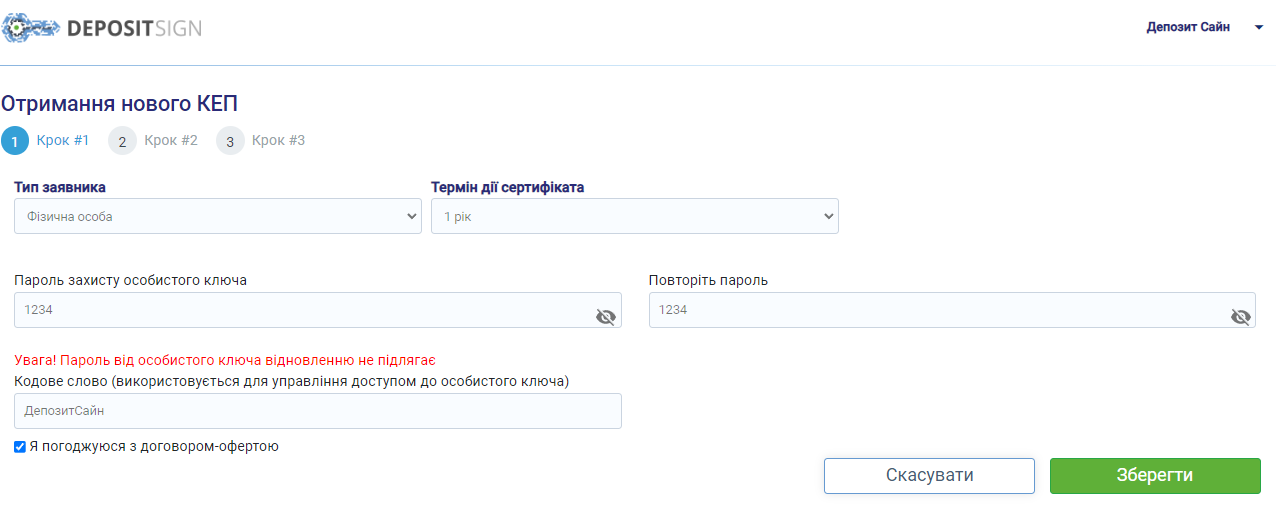
- In the “Certificate validity period” field, select the certificate validity period you need (1 or 2 years);
- In the “Personal key protection password” and “Repeat password” fields, specify the desired password for the electronic signature. Indicate a combination that you consider convenient and secure, there are no requirements for password complexity. This password cannot be recovered in the future.
- In the “Password” field, specify the word that will be used to control access to the private key.
- Click “Save”;
Step 2:
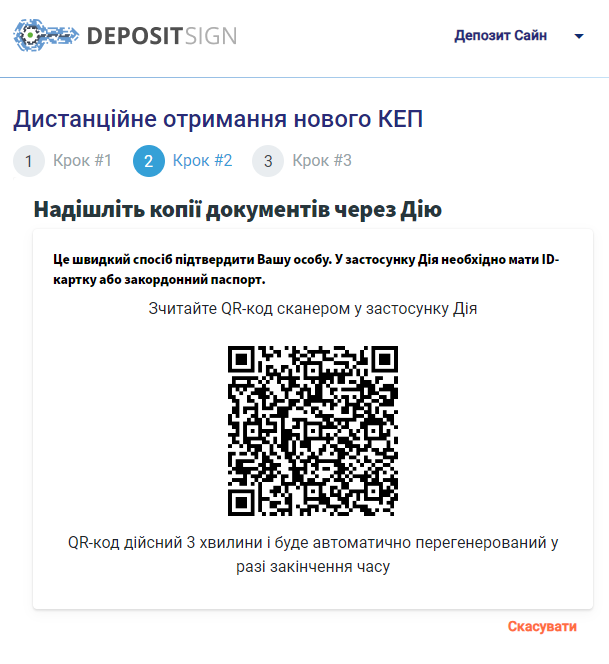
- Open the Diya application on your phone and scan the QR code on the screen of your device. If you are using your phone to receive a KEP from DepositSign, click on the QR code and our service will automatically redirect you to the Diya application for further registration of the KEP.
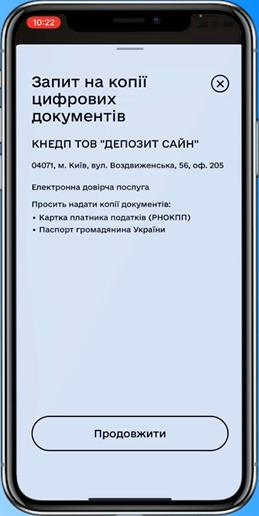
2. In the Diya application, review the request for copies of digital documents and click “Continue”. Wait a few seconds for the response to the request to be generated.
3. In the Diya application, by checking the appropriate box, confirm the provision of copies of digital documents to KNEDP LLC “DEPOSIT SIGN” (DepositSign) and click “Send via Diya”.
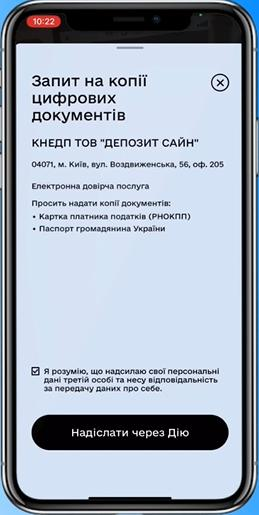
4. You can then click “Continue” to return to the main page of the Diya application and continue working in your “DepositSign” personal account.
Step 3:
After successful transfer of copies of digital documents, the user will be displayed a registration statement in their “DepositSign” personal account, where you can see the registration data that will be contained in the new DepositSign qualified certificates.
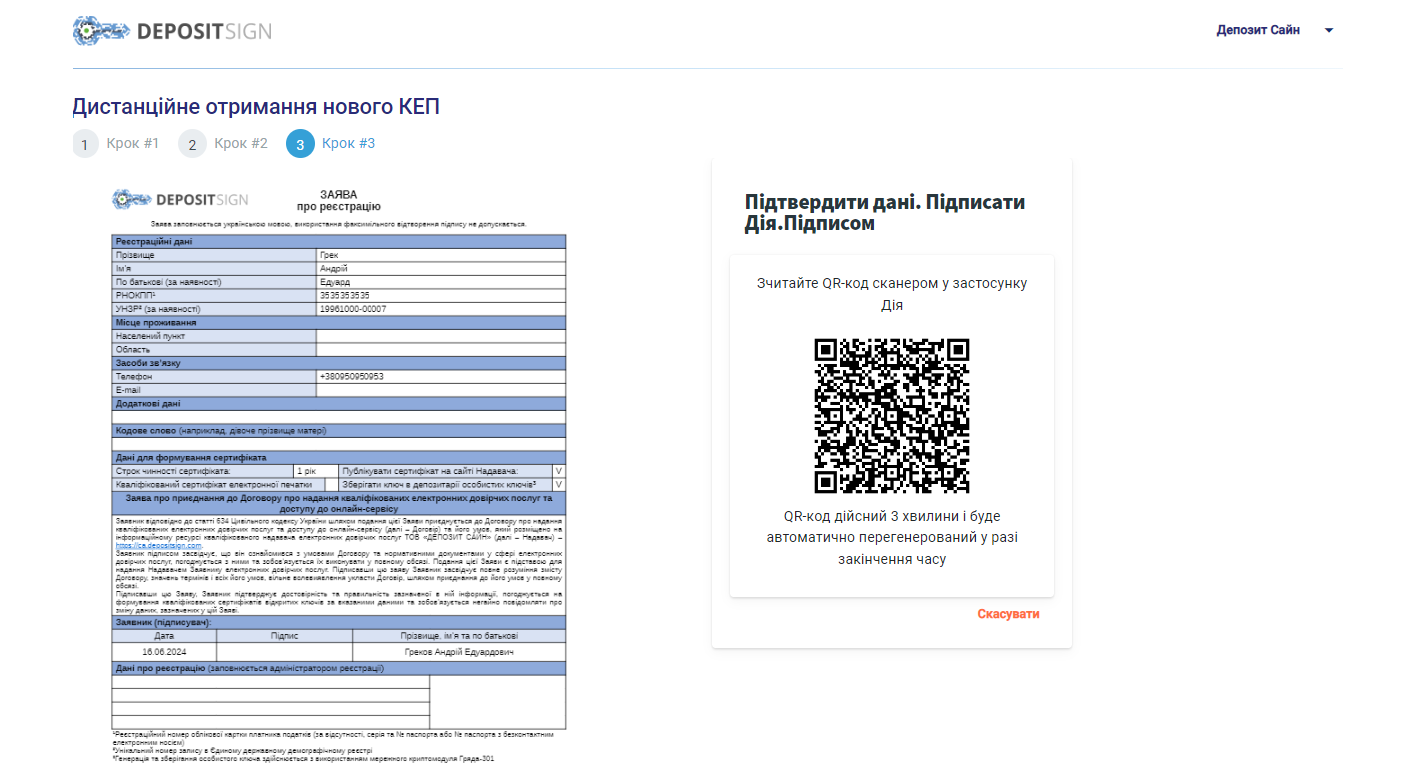
- Open the Diya application and scan the QR code located next to the Registration Application to confirm your data using Diya.Signature. If you are using your phone to receive a QES, click on the corresponding QR code and the service will automatically redirect you to the Diya application to further sign the application using Diya.Signature.
After successfully signing the application, payment options will be available to the user.

2. Online payment is made using the UAPAY payment service. To do this, the user must enter the payment card details and click “Pay”, then confirm the payment transaction. There is no payment fee.
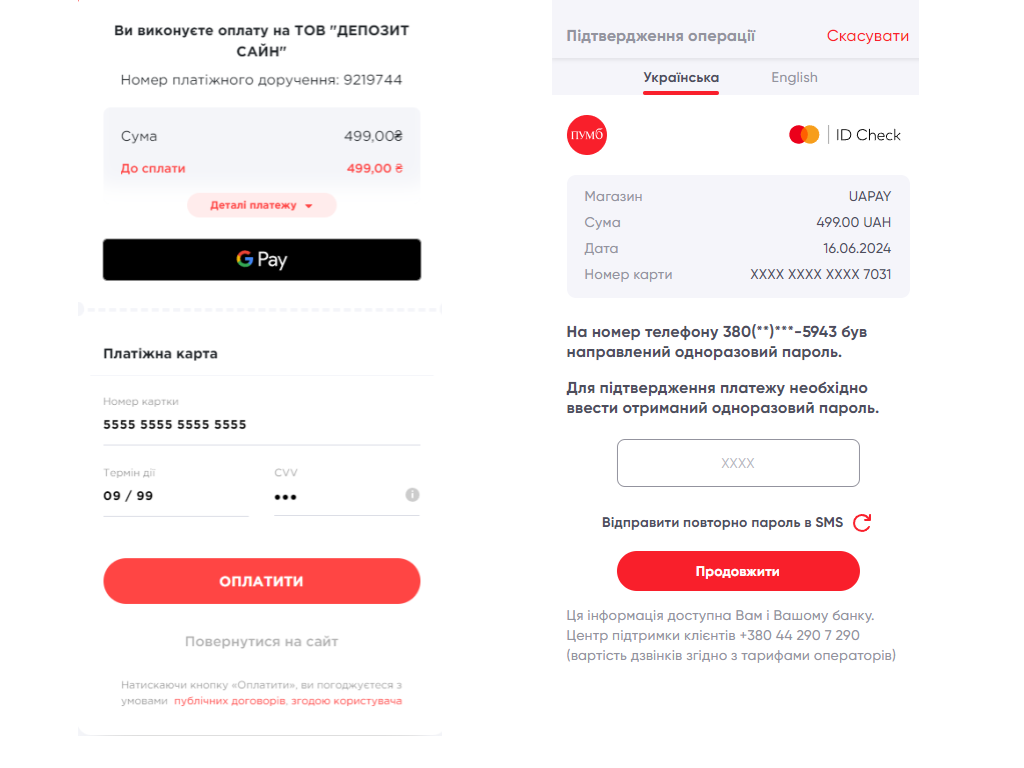
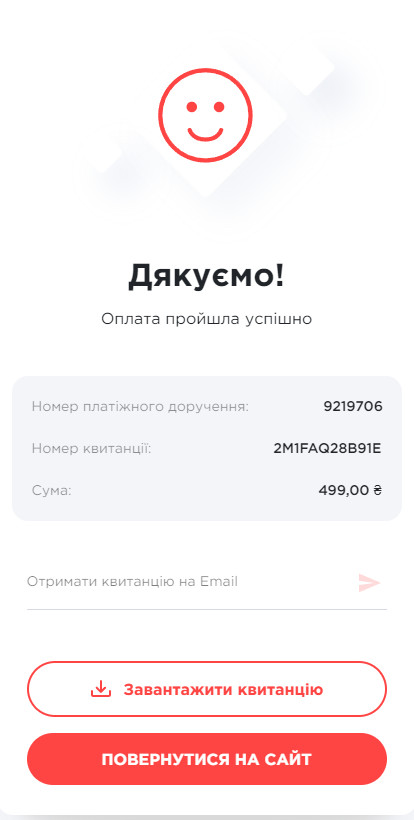
With a successful payment transaction, the user will receive a message – “Payment was successful”.
Attention! It is necessary to click “RETURN TO THE SITE” to correctly complete the payment.
3. When choosing the payment option by invoice, the system generates a special invoice for the user in the “.pdf” file format.
ATTENTION! When paying by invoice through the client-bank system it is necessary to specify the correct purpose of the payment, as indicated in the